First we had to gather up supplies. I always try and do this when Sister Bear isn't looking, or else I get a
million and one questions as to what I am doing. (this gets rather annoying, because I answer the same question a million times!)
Supplies:
- Shaving Cream
- Washable Paints
- Small Cups
- Card stock cut into hearts
- Cookie Sheet
- An old credit card or something similar
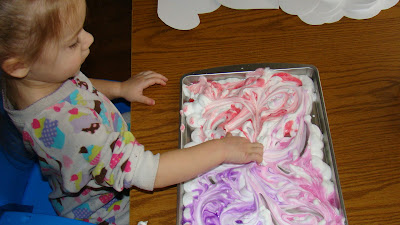
I added a little bit of water to some washable paints we had, and mixed it up in small cups. Then Sister bear helped me pour it on to the shaving cream. If you water down the paint too much it doesn't work as well.
I told Sister Bear to swirl the colors up with her finger. At first she didn't want to get her fingers messy and asked for a spoon. But I told her it would only work with her finger :-) Once she started she had a good time!
 |
| Swirl! |
Next came the fun part. Sister Bear being 2.5 wanted to do it herself. So I let her, and she did pretty good!
 |
| 1st attempt |
 |
WOW! |
 |
Of coarse not all of them were perfect, but that's OK!
I thought they looked pretty neat. I think next time I'll leave one with the shaving cream on and let it dry to see what happens.
 |
| Last one! |
On to the next step: getting the shaving cream off. I used my thingy (I use it when I work with dough) to gently scrape off the shaving cream. I cant remember what it is called :-/
 |
| Just scrap all the shaving cream off! Easy! |
OK so now we just have to let them dry... but I have all this pretty colored shaving cream left... what to do?
hhhhmmmmm.....
BATH TIME!!
 |
| Lets paint the bath! |
 |
| ooohh |
 |
| ahhh |
Brother bear was hanging out watching... and trying VERY hard to get the pan of shaving cream!
 |
| Such a cutie! |
 |
| SUCCESS!! |
 |
| I was laughing so hard! |
 |
| They are pretty! |
I think they turned out great! They have a really neat marbled effect to them! I think this is something we will be doing again... Maybe green shamrocks for St. Patties Day!
Well I hope you enjoyed this post as much as we enjoyed doing it! Let me know if you have done this project before, or are inspired by us to do it, I'd LOVE to see pictures! Thanks for stopping by and I hope you come back!


No comments:
Post a Comment