Showing posts with label Projects. Show all posts

April 17, 2013

New purse!

Hello!

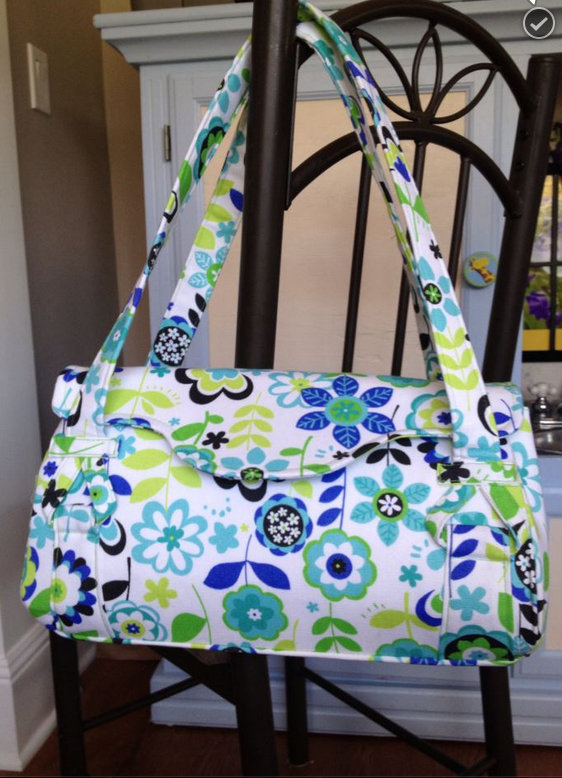
I found this super duper cute purse tutorial on Pintrest a while ago and have been wanting to make it. I finally had some time and a few (6) Joann's coupons, so in to crafting mode I went. It took me 3 days to make my purse and about 5 hours to make my daughter matching one. And that is working almost non stop... I didn't cook dinner for two days, no laundry, hardly any dishes or cleaning and went to bed really late :-D My family survived. Lets just say I get a little obsessed with new projects!

I did not take any pictures while I was making these and I am now KICKING my self for it! BUT, if I make another one, I will be sure to take pictures, LOTS OF PICTURES! I was so in to making it, (craft mode) that I honestly didn't want to take the time to take pictures, get good lighting, edit them, "pose" my stuff... just too much work. With the pattern I followed, there were very few pictures. If  I have something to look at in addition to reading how to do it, it make so much more sense to me and is easier.

I followed the pattern for my purse exactly ( to the best of my ability) and for my daughters I followed, for the most part, this tutorial. With hers I did make a few changes.

 
So here are some pictures of my new purse that I am IN LOVE with and my daughters matching one! The fabric is WAY WAY WAY outside my box, but I wanted something hip, and fun and bright! I normally wear a lot of blues, purples, blacks and greys, so this was definitely a change for me.
3 days of slaving over my sewing machine
The inside with 2 pockets - one zippered
our matching purses


Have you used either one of these patterns? Do you have a similar purse? I would LOVE to see pictures!  Thanks for stopping by!

Links   
Matching child's Purse
My Purse

February 20, 2013

EASY DIY Lanyard for Keys

I have A LOT of keys!  
I'm not even sure where 75% of them come from! On a daily basis I only use two - my car key and my house key. So I figured it was time to made a small lanyard for just my car and house keys. 
So here it is!

For this project I just dug through my scraps and found two fabrics that I liked. This is a great quick and easy scrap buster!

Supplies
  • Scraps
  • Iron on Pellon/interfacing
  • Iron
  • Key Ring
  • Basic Sewing Stuff (machine, scissors etc...) 
  • Cording or Bias Tape or Shoe Lace

 My scraps measured (about)
14in x 2.5in for the main piece.

And the small pink piece was about 5.5in x 2.5in.

But just use what every you have! I didn't want mine too long, so this was perfect. 


I started by ironing on pellon to my main piece. I have no idea what kind it is - it was some hand-me-down. But it has little bumps on one side (glue) and is smooth on the other. I trimmed the extra off. (it was a piece of scrap I had from another project)

I ironed it in half with right sides together. I did this so I wouldn't have to use pins when I took it to the sewing machine.

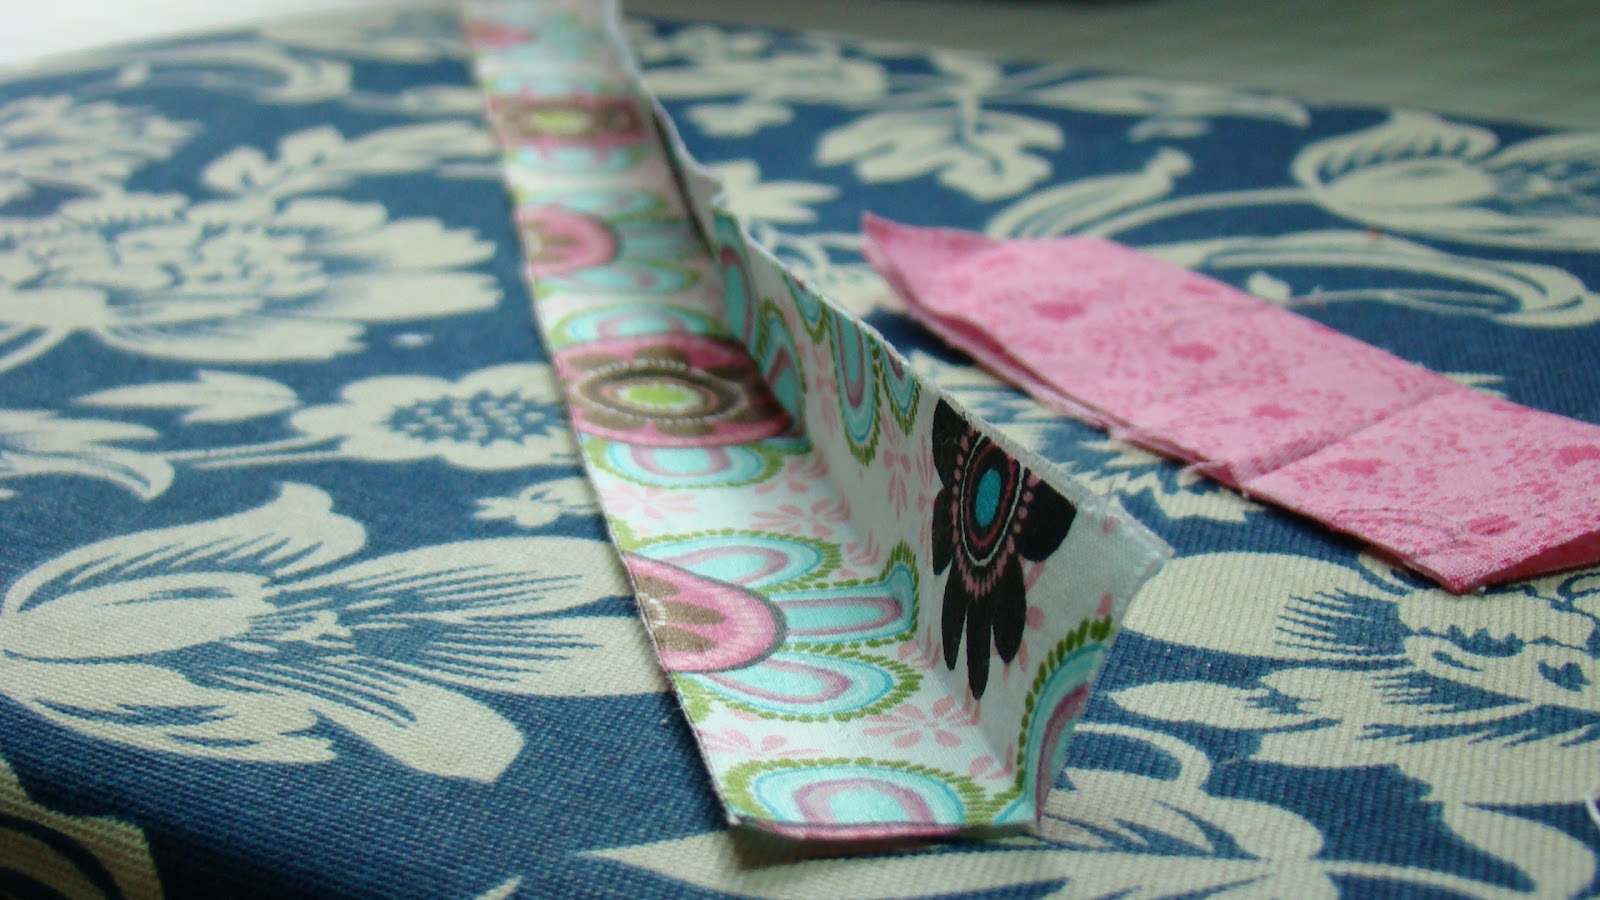
 My smaller piece I also ironed in half with wrong sides together and then opened it. I folded in the sides towards the middle and pressed.


So it looked like this...


I hate trying to turn narrow projects (so do my fingers) so I use this tip!

Next I went over to the sewing machine. I put a shoe lace up against the fold on the inside with a tail sticking out like in the picture.
I then sewed the top close making sure the shoe lace was secure! Don't worry, the shoe lace is just there to help up turn this right side out.

Make sure as you sew your seam, you don't catch any of the shoe lace. I like to use the shoe lace because it is thick and I can feel it while I'm sewing. But you could use ribbon, bias tape, or anything similar.


 When I got to the end I just folded up the ends like so. That way this end had a nice hem.
 Done!
The next part is the easy! Just pull! Once you get it started it goes really smooth! Best trick I have ever learned!

 Keep pulling!
Once you have it turned completely you can either trim off the end or use a seam ripper to undo your stitches. I LOVE this trick! Don't forget to remove the shoe lace!
I then ironed it out all nice and pretty and slipped on my key ring. I kept my key attached so you could see the ring.
  Take your two ends and put the non-hemmed end into the other end (hemmed). It might take some wiggling but it is do-able! I put it in at least 1/2in.

 Slid your key ring down towards your ends. Put your ring about an inch or two below the ends. Like so...
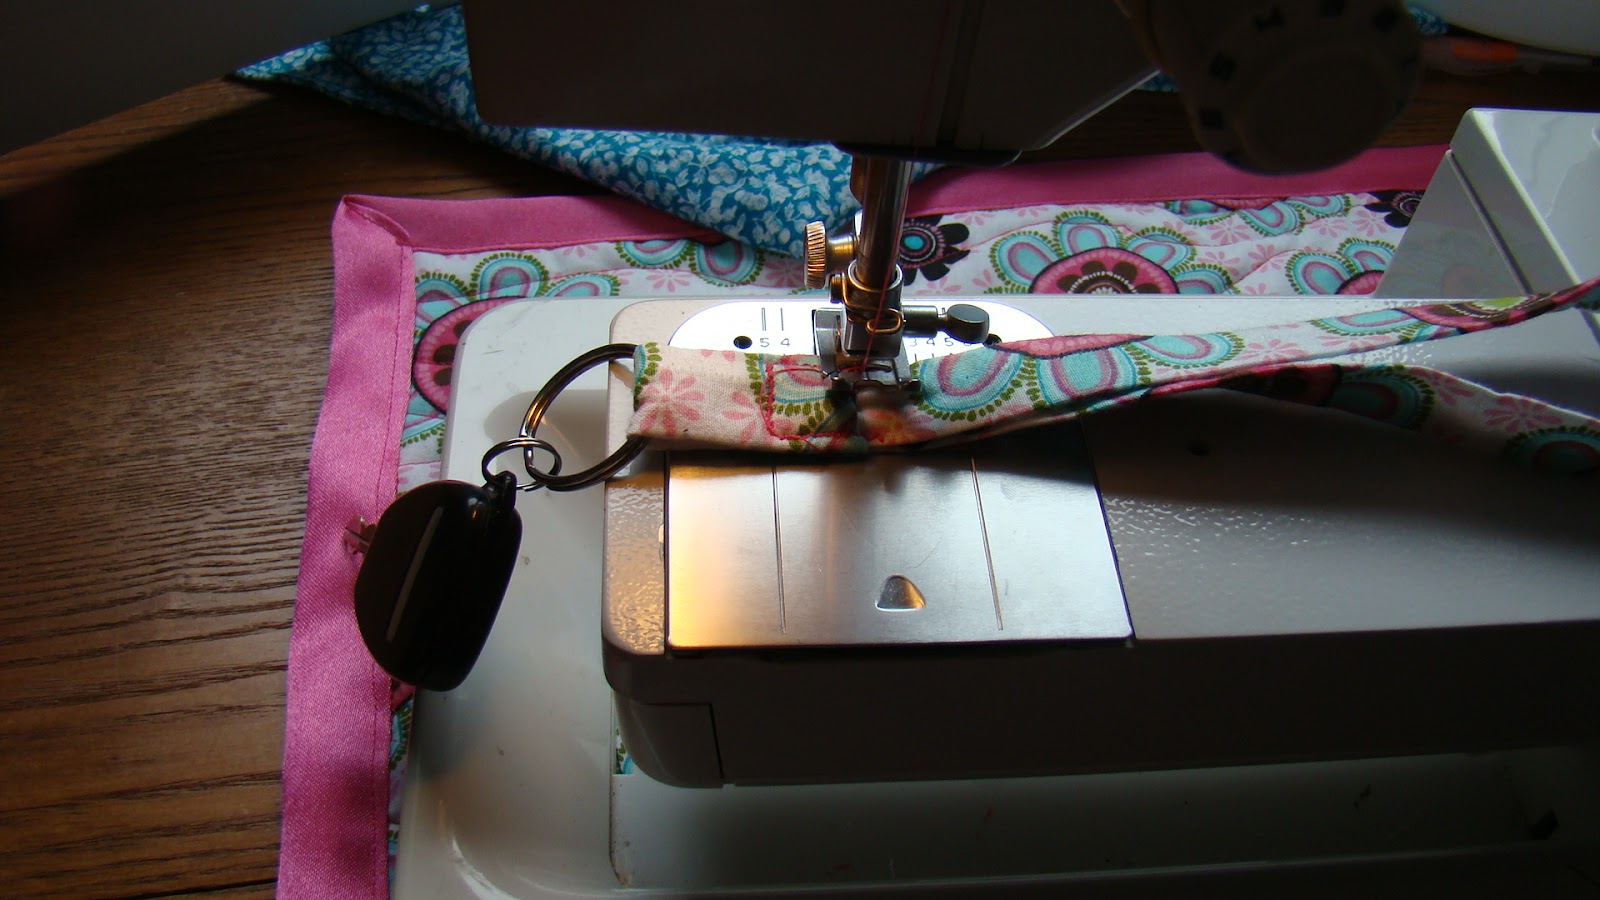
 Take the whole thing over to the sewing machine and sew a square to secure your ends so they don't come undone.
 See - easy! It doesn't have to look pretty because your going to cover it. I tested it by pulling and it stayed strong.
 I took my smaller scrap and wrapped it around where I just sewed. A quick trip to the sewing machine to sew it down and BAM I was done!
 Make sure you fold over and un-hemmed ends.
See! A nice new and pretty lanyard for my keys! I love it! The rest of my keys will probably just stay in my purse so I don't loose them.


Thanks for stopping by!

Have you made a lanyard for your keys? Or maybe for a thumb drive? (I might make one of those next!) I would love to see some of you pictures! Leave me a link and I'll stop by!

February 1, 2013

Felt Poptarts

Who doesnt like felt and poptarts?!? Well I decided to combine them and make Sister Bear couple easy peezy felt pop tarts to go with her kitchen. I whipped these out in about 30 minutes! I love quick and easy projects!

So heres how I did it..

Supplies:
  • Felt - colors of your choice
  • Thread
  • Sewing machine
  • Pinking shears
  • Scissors or rotary cutter
  • Ruler
 You could easily go over board and get real elaborate with theses, but I wanted to keep them simple.

First I cut out 4 rectangles that were 4 x 3 inches.

 Next I went around all the sides with my hand-me-down pinking shears to give it the pop tart look.
 Ta Da! This takes about 2 minutes!
 Next I just free handed the "frosting". I cut out two and laid them onto my poptart tops.


The next step I found the most time consuming :-/ I made sprinkles out of french knots. I had to do 2 knots for each sprinkle because they weren't showing up well.


 I have the red and white done!


Oh look! The blue is done! I totally wasn't planning on red, white and blue themed, but they turned out cute!
 The next step, super easy! Take your poptart top and your poptart bottom and sew them together! If you have good pinking shears, you could wait to cut the outside until this step.
 Ta Da! Cute felt poptarts! Super easy and totally free!
 I think I'm going to make more here soon. I see strawberry flavor in our future!
I hope you enjoyed our pop tarts! Have you made felt pop tarts or were you inspired by mine? I would LOVE to hear about it! Thanks for stopping by!

January 30, 2013

Shaving Cream Heart Garland

Well, I have to say I am addicted to Pintrest! ( I'm pretty sure I have mentioned that before) I think most crafters are. This project was another one I found while on Pintrest and knew we had to try it out. We had a lot of fun doing this and clean up was a breeze!

First we had to gather up supplies. I always try and do this when Sister Bear isn't looking, or else I get a
million and one questions as to what I am doing. (this gets rather annoying, because I answer the same question a million times!)

Supplies:
  • Shaving Cream
  • Washable Paints
  • Small Cups
  • Card stock cut into hearts 
  • Cookie Sheet
  • An old credit card or something similar
 Next, I put some shaving cream ($1 at Albertsons)on to a cookie sheet ($1 at Dollar tree). I used the one from sister bears kitchen.
I added a little bit of water to some washable paints we had, and mixed it up in small cups. Then Sister bear helped me pour it on to the shaving cream. If you water down the paint too much it doesn't work as well.
I told Sister Bear to swirl the colors up with her finger. At first she didn't want to get her fingers messy and asked for a spoon. But I told her it would only work with her finger :-) Once she started she had a good time!
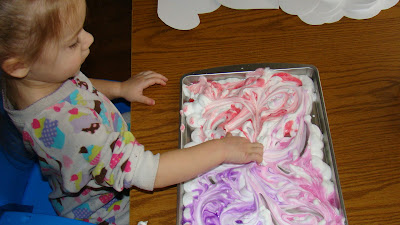
Swirl!
Doesn't it look pretty??
Next came the fun part. Sister Bear being 2.5 wanted to do it herself. So I let her, and she did pretty good!
1st attempt
All you do is lay the paper hearts onto the shaving cream and press gently. Make sure the shaving cream gets all over the heart, and then set it aside.

WOW!
On to #2!
She got the hang of it really quick and did all of them herself!

Of coarse not all of them were perfect, but that's OK!
I thought they looked pretty neat. I think next time I'll leave one with the shaving cream on and let it dry to see what happens.
Last one!
 We are almost done! Here are all of our hearts with the shaving cream on them! See it didn't make that big of a mess!
 On to the next step: getting the shaving cream off. I used my thingy (I use it when I work with dough) to gently scrape off the shaving cream. I cant remember what it is called :-/

Just scrap all the shaving cream off! Easy!
 Here is all our hearts after we took all the shaving cream off. OK so it made a bit of a mess, but not too bad. Wipes right up with a washcloth!
 OK so now we just have to let them dry... but I have all this pretty colored shaving cream left... what to do?
 hhhhmmmmm.....

BATH TIME!!
Lets paint the bath!
 I took a few close ups of the shaving cream because I thought it looked pretty neat. And I'm still learning my cameras settings :-)

ooohh
ahhh
 So back to painting! Surprisingly this didn't hold sister Bear attention very long. I ended up painting her and the walls! I think she was just done with it. Oh well.


 Brother bear was hanging out watching... and trying VERY hard to get the pan of shaving cream!
Such a cutie!
I looked away for a moment to grab my camera and...
SUCCESS!!
He then preceded to eat it. HAHA! Poor guy!

I was laughing so hard!
After the kiddos went to bed I punched 2 holes into each one and thread some red ribbon I had in my stash though them. Then I put them up in the door way to the living room along with out other valentines project we did the other day. ( I forgot to take pictures of that project!)
 
 I am standing in the kitchen looking into our living room in this picture. What you see through the door way is my "craft corner"!
They are pretty!

 I think they turned out great! They have a really neat marbled effect to them! I think this is something we will be doing again... Maybe green shamrocks for St. Patties Day!

 Well I hope you enjoyed this post as much as we enjoyed doing it! Let me know if you have done this project before, or are inspired by us to do it, I'd LOVE to see pictures! Thanks for stopping by and I hope you come back!